|
|
|
|
Central Point, OR 97502 USA www.TombstoneGrips.com Email: sales.tombstonegrips@outlook.com |


|
Black Grips
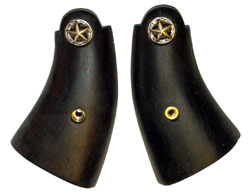
Black grip material can be ordered in several shades or depths of finish, including a very dark grey, or a more glossy black. Black surface effects such as brown highlights in simulated ebony are applied after the grip has been sanded to proper fit. You can distress or "age" the appearance with some directional sanding lines or stippling. You can restore or change the surface treatment to give your black grip a deeper, more glossy finish, or to add more of a black wood appearance with brown highlights. To do this, use ordinary black shoe polish (the kind that comes in flat round tins, a wax-based polish), an old toothbrush, and a small stiff bristle brush such as a child's hairbrush. First, tap the bristles of the toothbrush against the surface of the black shoe polish to pick up a small amount of the wax. Then strike the sanded areas of the grip with brisk, glancing blows of the bristles, to drive the bristles against the grip and force wax into the minute surface pores and fissures. You can see the sanded areas becoming darker with each stroke. After a dozen quick brush stroke, the wax will be forced into the pores but also will be on the surface. Let the wax dry for a few minutes, and then buff it briskly with the fine hair brush, which will remove excess wax and harden the surface, burnishing the edges of the pores. You will see the grip become darker and more glossy with this treatment. If you want a brownish appearance in the highlights, use a brown shoe polish first, but don't buff it until you have applied a second coat of black. Then buff. The black will be over the top of the brown, and will buff off first, exposing some brown highlight on the smoother sections. Seal the grips with a clear, hard car wax over the top of the other waxes, so that they won't rub off and stain your hands or clothing. This should be a fairly dry, hard paste wax, not one of the "easy shine" chemical mixtures with solvents that can dissolve the shoe wax layers. |
|
Wood, Ivory, and Bone grain lines
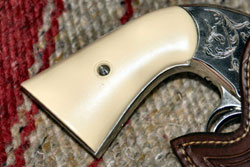
Ivory and Bone have fine pits and lines in the surface, which can be simulated by using a slightly rougher grade of sandpaper to apply a less smooth finish to the grips. The sanding should be done lightly, in the direction you want the grain to run. By creating fine grooves in the surface, you provide places for color tints and waxes to become trapped. The higher points on the surface will lose the tint or wax first, and leave the lines more prominent than when there is no coloring applied. You can test the effect as you go, and sand it off with finer abrasive cloth if you don't like it. Be careful around the edges of the grip, because sanding here will make the grip too small for the gun. An 80 or 100 grit paper will put a series of fine "scratches" in the surface which can be made to look like grain if you apply them in the correct direction only (don't try to move the paper around in circles or go cross-wise, or you will just get a weathered and scratched appearance rather than a wood grain effect). The tint or wax that you apply will have a different effect and be more pronounced when it is applied to this kind of prepared surface. On a smoother surface, the colors will be lighter and may rub off easily when buffed. Some effective stains are the same ones you might use to stain wood. Acrylic paints can be wiped on and rubbed to remove the surplus before they dry. Very little color will remain on the grip except where there are surface pits or scratches, and these will stand out. Although the polymer is fairly hard (shore 70) it can be indented with a stippling punch or even an ordinary nail setting punch. This can be used gently to apply an antiqued or worn surface, or to better simulate real bone or ivory that has aged, weathered, and now shows some small pits. Darkening the edges of a grip to make it look more aged works best if the area is sanded with 100 or 120 grit paper to roughen the surface slightly. A slick, fine finish does not hold the coloring very well. But it takes care to sand only up to the edge and not to remove the edge. If you plan on this treatment, it would be best to apply it while the grip is oversized and hasn't been sanded to fit the frame yet. |
|
|
Drilling Alignment Pin Holes
Many single action and most double action revolvers use a small pin in the butt of the grip frame, matching a blind hole drilled into the flat side of the grip panel, to keep the grip aligned with the frame. The fit and location of the hole in each grip panel is critical for good alignment and to keep the grip from rotating slightly around the grip screw. Once the grips have been sanded flat on the back, and the outline of the grips is sanded to match the grip frame, you are ready to drill the alignment pin holes. Normally the pin is just pressed into a hole in the gun's metal frame so that it projects slightly from each side. If so, the pin can be tapped out with a pin punch and small hammer. This lets you hold one panel to the frame and mark the exact hole location by using a center punch that fits through the frame hole, or marking the grip through the hole with a scribe or pencil. Then do the same with the other grip panel. Make sure that the hole location is correctly marked and aligned on the grip panel. The exact center of the hole should be "marked" or started with a small center drill. The grips are best drilled with flat drills rather than twist drills. A twist drill will tend to grab the grip and pull itself all the way through, unless you secure the grip to a drill press table. Using a hand-held power drill is risky. It would be far better to put the correct size drill bit, which is the same size as the alignment pin, in a hand chuck or pin vise, and turn it by hand. Once the hole location has been center drilled (a shallow conical indent is cut with a 60 degree center drill, which can be turned by hand in the soft grip material) it is easy to use a hand-turned bit, in a chuck or a T-handle tap wrench, to make a shallow, blind hole. The more carefully you locate this hole, and the closer the size is to the alignment pin, the better your grips will align and stay firmly in place with no movement. The main risk would be from using a power drill with a twist bit, which very often will "get away" from the user and pull itself right through the grip before you have a chance to react. If this should happen, it may be possible to repair the grip so that the hole doesn't show. Send it back with a note. The grip can be put back in their original mold, with a film of release agent, but the hole cleaned well with alcohol. Then a matching color of polyurethane can be carefully put in the hole from the back, filling it. When the polyurethane cures, the hole will be gone and if the color match is perfect, you will not be able to tell there was ever a hole! (This is easier with natural ivory than aged ivory, for example.) If you should accidently make the hole slightly out of place, ordinary 5-minute Epoxy can be mixed and used to fill the hole. Use an unfolded paper clip or a sharp toothpick to push the epoxy down into the hole and release any trapped air, so the hole is completely filled. After the epoxy fully hardens (which may take 24 hours, even for so-called 5-minute Epoxy, for a full cure), you can redrill the hole more accurately, even if it is partly drilled into the epoxy and partly into fresh grip material. To make sure the epoxy will stick in the hole, you can clean the hole with acetone or alcohol on a swab stick (you may have to reduce the swab diameter by taking some of the cotton off, in order to get it into the hole. But if you just drilled the hole and didn't handle the grip with greasy fingers, it is likely that the epoxy will stick just fine without any special cleaning. |
|
|
by Bill Krummel 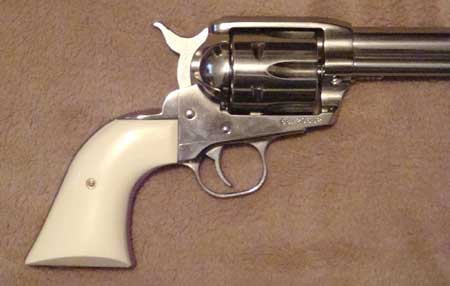 I fitted the grips to my Vaquero this morning and they came out about as nice as the ones I fitted to my Blackhawk. It does take some time to get the grips fitted properly to the grip frame, the first step being to get one grip fitted at the front and top where it meets the rear frame of the revolver and the very top front of the grip frame, right at the top front where the grip makes a 90* angle from horizontal to vertical.
Next I screw the two grips together and sand the front of the grips to match. This will insure that the screw holes line up when both grips are fitted to the frame. Next I drive out the pin at the bottom of the grip frame and place it on the side for reinstallation later. Now I fit both grips to the grip frame and insure that the grips fit on both sides at the top front of the grip where they meet the rear of the revolver frame and the top of the pistol grip frame. Once that is done, I tighten the grips on the grip frame and using a very sharp pencil, I trace the outline of the grip frame on the overlapping portion of the rear of the grips. I then remove the grips and sand to that line. I then clap each grip separately to the grip frame and drill through the hole where the grip frame pin was removed into each grip. I replace the grip frame pin into the grip frame and check the fit of each grip panel again. 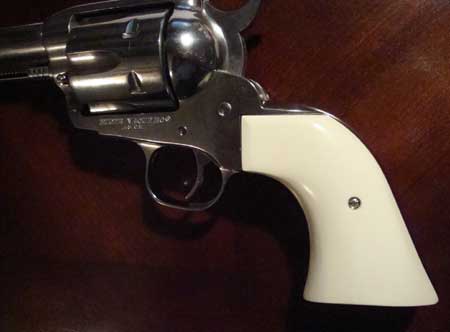 I place tape over the grip frame and reinstall the grips, now sanding the grips all around the grip frame down to the tape. The tape keeps me from scratching the grip frame and allows me to get an almost perfect fit. I then remove the grips, sand each with 400 grip, then 600 grip, then Dupont 7 polishing compound, then polish with automotive wax.
|
|